I. Introduction
Leather is a durable and stylish material that can add elegance and sophistication to any room or outfit. However, sometimes leather can be outdated, faded, or stained, and many people wonder if it’s possible to paint leather surfaces. The good news is that you can paint leather, but it requires some careful preparation and the right tools and techniques. This article will provide a comprehensive guide to painting leather surfaces, including furniture, accessories, and jackets.
It’s important to follow the guidelines in this article to achieve the best results and avoid damaging your leather. With some patience and care, you can transform your leather surfaces from drab to fab.
II. The Dos and Don’ts of Painting Leather: A Comprehensive Guide
Before getting started, it’s essential to know what to do and what not to do when painting leather. Here are some tips to guide you:
Tips for Preparing Leather Surfaces for Painting
1. Clean the surface thoroughly with a leather cleaner and let it dry completely. Avoid using any oil-based cleaners that can clog the leather’s pores.
2. Sand the surface gently with a fine-grit sandpaper to remove any peeling or flaking areas. Be careful not to sand too hard or damage the leather.
3. Apply a leather prep solution to open the pores of the leather and prepare it for painting. This can also help the paint adhere better to the surface.
Choosing the Right Paint for Leather
Not all paint types are suitable for leather surfaces. Here are some considerations when choosing the right paint:
1. Look for paints specifically made for leather surfaces. These paints are flexible, durable, and designed to bond well with leather.
2. Choose a paint color that complements your leather’s natural hue. Test the paint on a small area first to ensure it matches and to check for any reactions or changes in color.
3. Opt for a water-based paint that won’t clog the pores and will dry quickly. Avoid oil-based paints that can crack or peel over time.
Proper Painting Techniques
1. Apply thin layers of paint rather than a thick coat to avoid cracks or streaks. Allow each layer to dry completely before applying the next. Generally, 2-3 layers of paint should suffice for a smooth finish.
2. Use a good quality brush or a sprayer for an even application of paint. Avoid using a roller as it can create streaks or uneven surfaces.
3. If you’re painting leather furniture or larger surfaces, consider using a paint gun for a more professional look. This is not necessary if you are comfortable using a brush.
III. 5 Steps to Successfully Paint Your Leather Furniture
If you’re planning to paint your leather furniture, here are five easy steps to follow:
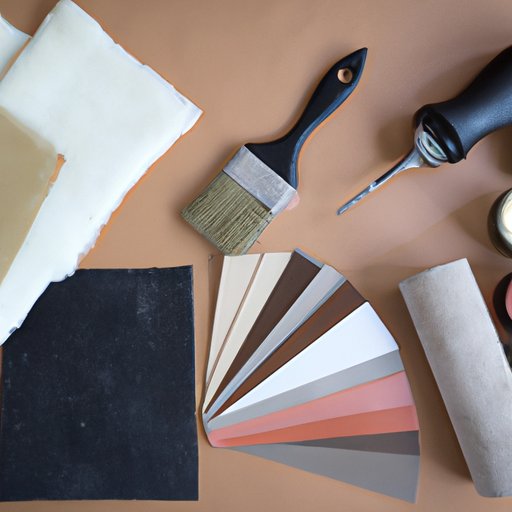
Materials and Tools Required for the Job
1. Leather cleaner
2. Fine-grit sandpaper
3. Leather prep solution
4. Acrylic leather paint
5. Paintbrush or spray gun
6. Clean cloth or towel
Tips for Prepping Furniture before Painting
1. Remove any existing paint or coatings by using fine-grit sandpaper or a paint stripper.
2. Apply a leather prep solution to the surface and let it dry completely.
3. Cover any parts of the furniture that you don’t want to paint with tape or plastic sheeting.
Techniques for Applying Paint and Avoiding Streaks or Drips
1. Apply a thin layer of paint with a paintbrush, starting from the center of the area and working outwards.
2. Cover all areas evenly with paint, overlapping strokes to avoid streaks.
3. For intricate details or hard-to-reach areas, use a small paintbrush or a Q-tip to apply the paint.
IV. Leather Painting Made Easy: Tips and Tricks for a Flawless Finish
For a flawless finish, here are some extra tips and tricks to consider:
Tricks to Avoid Fading or Cracking Paint
1. Avoid leaving the painted leather surfaces in direct sunlight or extreme heat, as this can cause fading or cracking of the paint.
2. Use a leather conditioner on the surface after painting to keep it supple and prevent cracking or peeling of the paint.
Using Stencils and Patterns for a Unique Look
1. Before painting, use stencils or patterns to add designs to the surface. Make sure the design is symmetrical and centered.
2. Apply the paint using a brush or spray gun, being careful not to smudge the design.
3. Let the paint dry before removing the stencil or pattern to avoid smudging or bleeding.
Tips for Finishing and Sealing Painted Leather Surfaces
1. Use a clear leather finisher or sealer to protect the surface from scratches or fading. This will also give it a polished look.
2. Avoid using harsh chemicals or abrasive cleaners on the painted surface, as this can damage the paint and the leather.
V. DIY Leather Painting: How to Transform Your Handbags and Shoes
If you’re tired of your old handbags or shoes, why not give them a new look with some paint? Here’s how:
Materials and Tools Required for the Job
1. Acrylic leather paint
2. Paintbrushes
3. Fine-grit sandpaper
4. Leather prep solution
5. Clean cloth or towel
Choosing the Right Paint for Accessories
1. Choose colors that match your existing accessories or go for bold, contrasting colors for a new look.
2. Use water-based, flexible paints for a smooth finish that won’t crack or peel.
3. Use fabric or leather paint for textured fabrics or leather.
Techniques for Painting Intricate Details and Avoiding Smudging
1. Use a small paintbrush or a Q-tip for intricate details or hard-to-reach areas.
2. Apply a thin layer of paint, being careful not to overload the brush.
3. Let the paint dry completely before handling the accessory to avoid smudging or bleeding.
VI. The Pros and Cons of Painting Leather: Is It Worth the Effort?
Before deciding to paint your leather surfaces, it’s important to consider the pros and cons:
Discussion of the Benefits and Drawbacks of Painting Leather Surfaces
Pros:
1. Painting leather surfaces can be a cost-effective way to transform your old or worn-out furniture or accessories.
2. Painting gives you the freedom to choose the color and design you want, rather than being restricted to natural leather hues.
3. Painted leather surfaces are durable and easier to maintain than some natural leather materials.
Cons:
1. Painted leather surfaces may not be as durable or long-lasting as naturally treated leathers.
2. The quality of the finish may depend on your skills and the quality of the materials you use.
3. If not done properly, painting leather surfaces can damage the leather and cause peeling or cracking over time.
Factors to Consider before Deciding Whether to Paint Leather
1. Consider the age and condition of the leather surface you want to paint. Newer leathers may not require painting, and some older leathers may need restoration or repair, rather than painting.
2. Determine the type of leather you want to paint. Some leathers may not take well to painting or may require special preparation or paint types.
3. Decide on the color and design you want, and make sure it complements your decor or style.
VII. From Drab to Fab: A Beginner’s Guide to Painting Leather Jackets
If you want to update your leather jacket, painting it can be a fun and easy DIY project. Here’s how:
Materials and Tools Required for the Job
1. Leather cleaner
2. Fine-grit sandpaper
3. Acrylic leather paint
4. Paintbrushes
5. Leather prep solution
Tips for Prepping Jacket before Painting
1. Remove any existing paint or coatings on the jacket by using fine-grit sandpaper or a paint stripper.
2. Clean the surface with a leather cleaner and let it dry completely.
3. Apply a leather prep solution to open the pores of the leather and prepare it for painting.
Techniques for Painting Intricate Details and Avoiding Smudging
1. Use a small paintbrush or a Q-tip for intricate details or hard-to-reach areas.
2. Apply a thin layer of paint, being careful not to overload the brush.
3. Let the paint dry completely before handling the jacket to avoid smudging or bleeding.
VIII. Conclusion
Leather painting can be a fun and rewarding DIY project, but it requires some careful preparation and the right tools and techniques. We’ve provided a comprehensive guide to help you paint leather surfaces successfully, including furniture, accessories, and jackets. Remember to choose the right paint, prepare the surface well, and apply the paint in thin layers for the best results. Whether you’re a beginner or an experienced DIY enthusiast, you can transform your leather surfaces from drab to fab with confidence and care.


