Introduction
Random Access Memory (RAM) is a critical component of your computer that temporarily stores data your computer needs to access quickly. Over time, your computer’s RAM performance may degrade due to various reasons like too many processes running simultaneously, outdated drivers, viral infections, and insufficient memory. Checking RAM regularly is crucial to ensure optimal computer performance, avoid system crashes and ensure that your investment in the computer is worth it.
In this article, we will explore how to check RAM through various methods, including the built-in Windows tools, third-party software, BIOS/UEFI settings, and PowerShell commands. By the end of the article, you will be equipped with the knowledge and skills to optimize your computer’s performance and avoid crashes.
Basic Steps
Before we delve into how to check RAM, let’s first look at the basic steps involved.
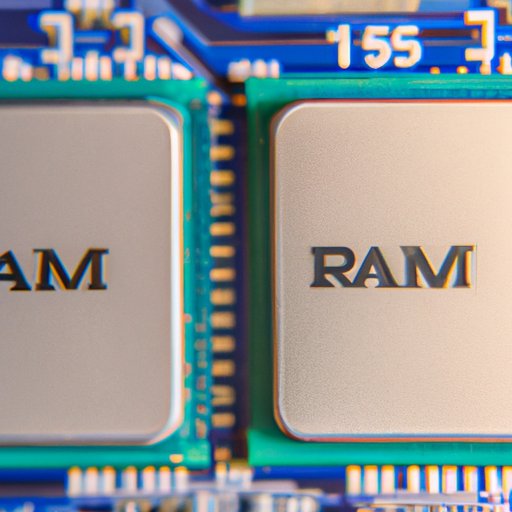
Locating the RAM in Your Computer
The first step in checking RAM is to locate its physical location in your computer. RAM is typically located in the motherboard, and its location varies between computers. Check your computer’s user manual to identify the location of RAM in your computer.
Removing the RAM
Once you locate the RAM, you need to remove it from the computer. To do that, you need to switch off your computer and unplug the power cable. Open up the computer case, locate the RAM, and press the levers on either side of the RAM module to release it. Gently pull the module out of the slot.
Tools Needed for the Process
To check RAM, you need various tools, including a screwdriver, grounding wrist strap, and cleaning cloth. Ensure that you have these tools before proceeding.
Checking RAM Usage through Windows Task Manager
Windows Task Manager is a handy tool in Windows that allows users to view and manage running processes, including those using RAM resources. Here’s how to use it to check your RAM usage.
Opening Windows Task Manager
Press the Ctrl+Shift+Esc keys simultaneously, right-click on the taskbar, and select Task Manager, or press Ctrl+Alt+Delete then select Task Manager from the list.
Checking RAM Usage
Once you launch Windows Task Manager, click on the “Performance” tab at the top, and select “Memory” to view your RAM usage. The Memory graph displays a real-time trend of your computer’s memory use.\
Interpreting the Results
Interpreting the results displayed on your Windows Task Manager involves understanding what the data means. The data typically consists of the total amount of RAM in your computer, the amount of RAM that is being used at the moment, the total amount of RAM that has been used since you started your computer, and the RAM that is free. If your computer has very little free memory, it may indicate that your RAM is full, and you need to upgrade.
Checking RAM through System Information Tool
The System Information Tool in Windows provides comprehensive details on the hardware components of your computer, including RAM.
Locating the System Information Tool in Windows
To open the System Information Tool, press the Windows key + R then type “msinfo32” in the dialog box and press Enter.
Checking RAM through the Tool
Once you open the System Information Tool, click on “Components” in the left-hand pane, then click on “Memory” to view the RAM information. The tool provides details like the RAM type, speed, and size.
Providing Screenshots for Clarity
Providing screenshots is a great way to enhance clarity.
Third-Party Software for Checking RAM
There are various reliable third-party tools that you can use to check your RAM.
Reviews of these Tools
Before you choose any third-party tool, it is essential to review its functionality, reputation, and user reviews. Some of the top RAM checking tools include Memtest86, CPU-Z, and NirSoft RAMMon.
Step-by-Step Tutorial on How to Use Them
Each third-party tool functions differently, making it essential to provide step-by-step guides on how to use them. However, most RAM checking tools typically involve launching the tool, selecting the RAM option, and viewing the results.
Checking RAM through BIOS/UEFI Settings
Your computer’s Basic Input Output System (BIOS) or Unified Extensible Firmware Interface (UEFI) settings provide various hardware details, including RAM information.
Accessing BIOS/UEFI Settings
To access your computer’s BIOS or UEFI settings, restart your computer and press the key combination displayed during startup. The key combination varies based on the computer. You can check your computer’s user’s manual for details.
Checking RAM through these Settings
Once you access your computer’s BIOS or UEFI settings, navigate through the menus to find the RAM settings. The RAM settings provide details like RAM size, speed, and type.
Providing Detailed Steps for Clarity
Navigating through your computer’s BIOS or UEFI settings can be challenging. It is essential to provide detailed steps to enhance clarity.
Checking RAM through PowerShell
PowerShell is a command-line tool in Windows that allows users to interact with their computer’s system and automate tasks.
Introduction to PowerShell
PowerShell allows users to write scripts to perform various functions, including checking RAM usage.
PowerShell Command to Check RAM
To check your computer’s RAM through PowerShell, launch PowerShell, and type “Get-CimInstance -ClassName Win32_PhysicalMemory | Measure-Object -Property capacity -Sum” and press Enter.
Providing a Guide on Using PowerShell for Checking RAM
Using PowerShell for checking RAM requires advanced computer knowledge. It is essential to provide a guide that outlines the command-line syntax to enhance clarity.
RAM Diagnostic Tool
Windows has a built-in memory diagnostic tool that allows users to scan their computer’s RAM for errors.
How to Run the Tool
To run the RAM diagnostic tool, type “Windows Memory Diagnostic” in the search bar and press Enter. The tool will start scanning your computer’s RAM for errors.
Interpreting the Results
The RAM diagnostic tool will provide details of any errors detected in your computer’s RAM, making it easier to resolve the issues.
Conclusion
Checking RAM regularly is crucial to ensure optimal computer performance, avoid system crashes, and ensure that your investment in the computer is worth it. This article has explored various methods of checking RAM, including the built-in Windows tools, third-party software, BIOS/UEFI and PowerShell commands. By implementing these methods, you can optimize your computer’s performance and avoid crashes.


