Introduction
If you’re an aspiring cartoonist or simply someone who loves doodling, you know how important it is to create expressive and realistic-looking eyes. The eyes are the windows to a character’s soul, and by mastering the art of drawing eyes, you can add depth and emotion to your cartoon characters. In this article, we’ll provide a step-by-step tutorial on how to draw cartoon eyes, as well as tips and tricks on how to make them look unique and expressive. We’ll also discuss different cartoon styles, analyzing real-life reference photos, portraying emotions through eyes, drawing eyes at different perspectives, common mistakes to avoid, and more.
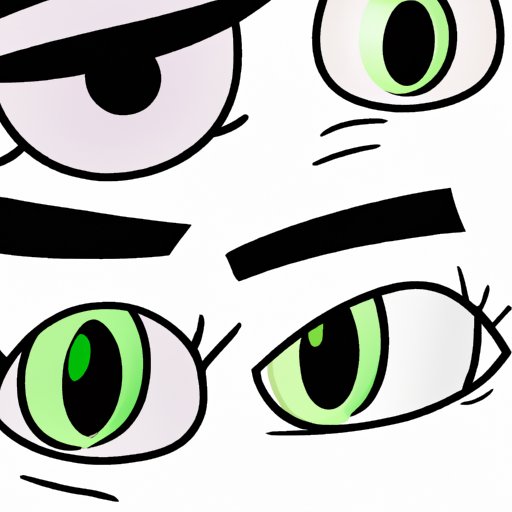
Step-by-Step Tutorial
Before we dive into the specific steps, it’s important to note that drawing eyes involves several elements that all work together, including the shape of the eye, the iris, the pupil, the eyelids, and the eyelashes. Here are some general steps for drawing cartoon eyes:
- Start by sketching the basic shape of the eye. This can be a simple oval or somewhat almond-shaped, depending on the style and expression you want to achieve.
- Add the iris and pupil. The iris is the colored part of the eye, while the pupil is the black or dark center. Remember to leave some space for the reflection of light on the iris.
- Draw the eyelids. Eyelids take different shapes depending on the eye’s expression and style. For example, round lids generally indicate a softer and more innocent look, while sharp, angled lids convey anger or determination. Adding eyelashes can add depth and definition to the eye.
- Add highlights and shadows to the eye. This will make the eye look more realistic and three-dimensional. The highlight should be placed where the light is hitting the eye, while shadows can be added to the indented areas around the eyelids or under the iris.
To create a unique and expressive look, you can experiment with different shapes, colors, and details. For example, circular pupils can give your character a more cartoonish look, while slanted pupils can add a touch of mystery or seriousness. Adding different styles of eyelashes or eyeliner can also change the expression of your character’s eyes.
Comparing Different Cartoon Styles
Different cartoon styles can have varying approaches to drawing eyes. Here are some examples:
Anime
One of the most popular cartoon styles, anime eyes often have exaggerated size and detail. The irises and pupils are often very large, and the eyelids are drawn with thick, curved lines. Often, characters in anime have different colored eyes to express their personalities or abilities. Be aware that the style may require the understanding of the face structure and proper proportionality of the facial features.
Disney
Disney eyes have a simple but iconic design. While their size and shape vary depending on the character, the irises are usually small and the pupils are round. Eyelids are drawn with a signature curved shape and a thick upper and lower line that gives Disney characters a very friendly and approachable appearance.
Marvel Comics
Marvel Comics characters often have very detailed and expressive eyes. The irises and pupils can vary in size and shape depending on the character’s powers or personality, and the eyelids are often drawn with lots of smaller curves and details to give the eyes more depth and expressions. The eyes are highly focused on the characteristics of the character, and can give them a striking and memorable appearance.
Analyzing Real-Life Reference Photos
Using real-life reference photos can help you create more realistic-looking cartoon eyes. Here are some tips for using reference photos:
- Take photos of eyes with a clear, bright resolution and no distracting elements in the background.
- Pay attention to the color and shape of the iris, as well as the size and shape of the pupils.
- Look at how the eyelids rest on the eyes and how the lashes curve and sweep.
- Study the highlights and shadows in the eye and how they relate to the light sources around them.
Remember, using a reference photo doesn’t mean you have to replicate it exactly. The goal is to capture the general structure and details of the eye and use that as inspiration to make your own unique and expressive designs.
Portraying Emotions Through Eyes
Eyes can be very expressive and can convey a wide range of emotions. Here are some examples:
Happiness
Happy eyes are usually wide open and round, with curved and raised eyebrows, indicating a state of joy or excitement.
Sadness
Sad eyes are often droopy and have a slight downward curve at the corners. The iris and pupils may appear smaller and less defined, indicating a lack of brightness or energy.
Anger
Angry eyes are usually narrow and slanted, with sharp, thick eyebrows, indicating a strong feeling of frustration or aggression. The iris and pupils may appear smaller due to the emotions too.
Fear
Eyes that are scared or startled often have wide open, oval-shaped pupils, indicating an intense or panicked response to stimuli.
By adjusting the size, shape, and position of the pupils, as well as the curvature and tilt of the eyebrows, you can create a wide range of emotions in your characters.
Drawing Eyes in Different Perspectives
Drawing eyes from different perspectives can add depth and realism to your characters. Here are some tips for drawing eyes in different angles:
- When drawing eyes at an angle, be mindful of how the eyelids and pupils will be affected by perspective. If the eye is facing downward, the iris and pupil may appear smaller, and the eyelids will be more heavily curved.
- When drawing eyes in 3/4 or profile view, remember that one eye may appear larger than the other due to the angle. The line quality of the lashes, eyeliner, lower eyelid and upper eyelid will change so also be mindful about these small details.
- Take into account the subtle nuances in the shape and size of the eyes and how it can differ based on different angles. When the eyes move, their curvature and shape also changes with the movement.
By experimenting with different perspectives, you can create characters that appear to be more three-dimensional and visually striking.
Common Mistakes to Avoid
While drawing cartoon eyes can be a fun and rewarding experience, there are common mistakes that beginners tend to make. Here are some tips to avoid those mistakes:
- Avoid symmetrical eyes: In reality, unless the character is looking straight towards the viewer, their eyes will not be symmetrical. Drawing eyes the same size and shape can create a uniform and flat appearance in the character’s face.
- Avoid too many details: Adding too much texture and detail to the eye can make it appear cluttered, and the character can look overly complicated.
- Avoid flat and expressionless eyes: Remember that eyes can express emotion and add depth to the character, so try to avoid making them too flat or lifeless.
Remember, practice makes perfect! Improving your eye-drawing skills is all about experimentation, trial, and error. Don’t hesitate to keep trying and practicing until you are satisfied with the outcome of your drawings.
Conclusion
Drawing cartoon eyes can be a fun and rewarding experience that can bring your characters to life. In this article, we have provided a step-by-step tutorial on how to draw cartoon eyes, discussed different cartoon styles, integrating real-life reference photos, portraying emotions through eyes, drawing eyes at different perspectives, and avoiding common mistakes. By mastering these techniques and tips, you can create expressive and unique cartoon characters that convey a wide range of emotions.


