Introduction
Embroidery is a timeless craft that has been enjoyed for centuries. It involves creating designs on fabric with needle and thread, and with the rising popularity of personalized and handmade items, embroidery is making a comeback. Whether you’re looking to embellish a garment, personalize a gift, or simply create something beautiful to display, embroidery is a great way to add a personal touch to your projects.
A Beginner’s Guide to Embroidery: Step-by-Step Instructions and Tips
If you’re brand new to embroidery, don’t worry. Getting started is easy and requires only a few basic supplies. Here’s what you’ll need to begin:
– Embroidery hoop: A hoop holds your fabric taut while you stitch, making it easier to create neat and even stitches. Hoops come in various sizes and materials, but a 6-inch wooden hoop is a good place to start.
– Embroidery floss: This is the thread used for embroidery. It comes in hundreds of colors and is made up of six strands that can be separated for different effects.
– Embroidery needles: These are designed with larger eyes to accommodate embroidery floss. The size of the needle you use will depend on the fabric you’re using and the thickness of the floss.
To begin embroidering:
1. Select a design: You can choose a design from a pattern or create your own. If you’re just starting, stick to simple designs with few colors.
2. Transfer your design: Transfer the design onto your fabric using a transfer pencil or a water-soluble stabilizer, which dissolves when you’re finished stitching.
3. Secure your fabric: Place your fabric in your embroidery hoop and tighten the screw to keep it taut.
4. Thread your needle: Cut a length of embroidery floss to the desired length, separating it into individual strands if needed. Thread your needle with one or more strands of floss, depending on the thickness you want for your design.
5. Start stitching: There are many different embroidery stitches you can learn, but start with a basic stitch like the backstitch. Follow your design and start stitching from the back of the fabric, bringing the needle up and pulling it through to the back again, creating a line of stitches.
Tips for successful embroidery:
– Use sharp needles: Dull needles can make your thread fray or cause your fabric to pucker.
– Keep your floss untangled: When working with multiple strands, be sure to keep them untangled to avoid frustration and wasted time.
– Practice your tension: Try to keep your stitches an even tension as you work. If stitches are too tight, they can pull on the fabric and cause puckering. If they’re too loose, they can create gapes and make your work look sloppy.
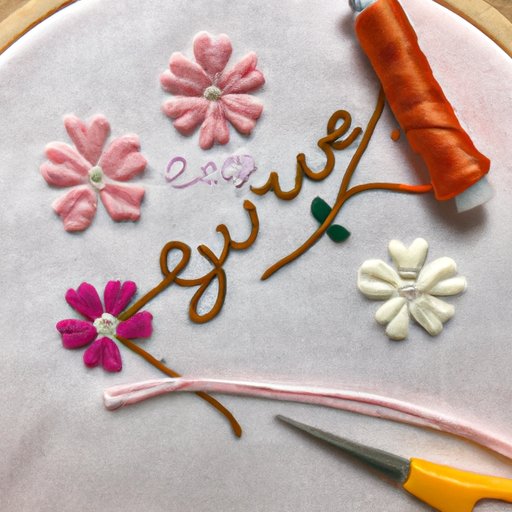
10 Basic Embroidery Stitches to Make Your Designs Stand Out
Now that you know the basics of embroidery, let’s take a deeper look at some popular embroidery stitches you can use to make your designs stand out.
1. Backstitch: This stitch is excellent for outlining and creating fine lines. To execute, bring the needle up through the fabric and then down a short distance away, then bring the needle up through the fabric again in the middle of the two holes and repeat.
2. Running stitch: Similar to backstitch, running stitch is a simple stitch used for outlining. The difference is that instead of stitching backward, the stitcher does not double back on the line.
3. Satin stitch: This is a beautiful filling stitch that can be used to fill shapes or letters with color. To start, bring your needle up through the fabric at the bottom of your shape, then move up and over slightly and take the needle down through the fabric, creating a smooth, even line.
4. French knot: A classic stitch used to add texture to embroidery. Create a French knot by bringing your needle up through the fabric, wrapping the thread around the needle once or twice, then inserting the needle down through the fabric close to the spot where you started and pulling the thread taut.
5. Chain stitch: A popular stitch used in outlining and filling. To make a chain stitch, bring the needle up through the fabric, then insert it back down and bring it back up through the fabric again a short distance away. Draw the thread through the initial loop.
6. Stem stitch: Often used in floral designs to create curving lines. Create a stem stitch by bringing the needle up through your fabric, then bringing it back down so that the tip of the needle is facing left. Stitch the next stitch by pushing the needle up through the fabric to the right of your previous stitch, inserting it down through the fabric to the left. Continue in this manner.
7. Fly stitch: Used mainly for adding extra decorative details to embroidery. First, create a vertical stitch in the fabric and bring the needle up from the back, a small distance away from the central stitch. Insert the needle through this stitch, creating a loop and weave back down with the needle, creating a triangular stitch above the central stitch. Repeat.
8. Cross-stitch: A simple two-stitch stitch, commonly used to create text to go with embroidery designs. A strip of ‘X’s across a broad surface mimics a fabric texture, creating an additional colored surface.
9. Bullion stitch: One of the more advanced stitches. Great to add a unique dimensional element to petals and leaves. To create a bullion knot, wrap the embroidery floss around your needle at least four times (up to ten) and insert the needle in the next stitch. Slide the looped thread off.
10. Lazy daisy stitch: A stitch that creates petal shapes. Make a curved stitch and bring the needle down through the end point of the curve and create a straight stitch.
Tips for using each stitch effectively:
– Practice on a scrap: Practice stitches on a scrap fabric before you begin on your project. This way, you can test the stitch and familiarize yourself with the technique without worrying about ruining your design.
– Experiment with colors: Mix and match different colors of floss to create unique and vibrant designs.
– Be confident: Don’t be afraid to make mistakes. Embroidery is a learning process, and practice makes perfect.
Finding the Right Embroidery Supplies: A Comprehensive Guide
Now that you have a better understanding of what type of stitching to use, it’s time to explore the different types of embroidery supplies you’ll need. Here’s what you should keep in mind when selecting supplies:
– Fabric type: Cotton, linen, silk, and wool are a few of the fabrics used for embroidery. Consider the type of fabric your design will be stitched to and make sure it will support the embroidery stitch.
– Thread type: Most embroidery thread is made from cotton, silk, or rayon, but also other materials. Ensure that the thread type that you choose is a good match for your chosen fabric.
– Embroidery hoop size: Embroidery hoops range in size from just a few inches to more than ten inches in diameter. As a beginner, start with smaller hoops, as it becomes easier to use them during the bending and stitching phase.
Now, evaluate and see what materials will work best for your project. Investing in quality materials saves you in the long run.
From Cross-stitch to Crewel: Different Types of Embroidery and How to Master Them
Embroidery involves a lot of work and includes several types of stitch techniques and designs that you can explore. The following are some embroidery techniques that you can master.
– Cross-stitch: Simple ‘X’s form this pattern used to create words and designs that cover a large area.
– Crewelwork: A needlepoint technique that uses wool to create a soft-looking, colorful, and textured decorative picture.
– Appliqué: This embroidery technique is the process of adding a cloth piece or cutout to a bigger fabric right from the top.
– Blackwork: This is a simplistic cross-stitch that makes use of black thread to decorate fabric. This style is great for adding borders or to integrate elements into any embroidery project.
– Ribbon embroidery: This embellishment technique utilizes ribbon instead of embroidery thread and employs ribbon for added dimension and texture work.
Tips for selecting appropriate embroidery techniques for different projects:
– Consider your level of skill: Some embroidery techniques are more complex than others and require varying levels of skill. Choose techniques that will challenge your skills without being frustrating.
– Consider the type of project: The embroidery techniques you choose should complement the construction and stitching of your project.
– Consider the purpose of your project: Is your embroidery project going to be used for decoration or a more practical reason like on a piece of clothing or an accessory?
10 Beautiful Embroidery Projects to Try at Home
Now that you know the basics of embroidery and some of the different techniques and stitches, it’s time to put your skills to the test with some projects. Here are ten beautiful embroidery projects for all skill levels:
1. A simple embroidered quote
2. Embroidered flowers on a denim jacket
3. A monogrammed handkerchief
4. A floral photo frame ornament
5. Embroidered bees on a linen tote bag
6. A vintage-inspired embroidered portrait
7. A festive embroidered Christmas tree ornament
8. A beginner’s embroidered tea towel
9. A custom-embroidered denim shirt
10. A sweet floral embroidered banner
Embroidery for Mindfulness: How Stitching Can Improve Mental Wellbeing
While embroidery is known for its decorative potential, it also comes with some therapeutic benefits. Stitching is a way to relax, calm your mind, and even meditate. Countless crafters find it to be very soothing and effective at reducing stress levels. “Stitch meditation” is just a simple process of stitching in slow repetitive motions which has been found to relieve stress.
Tips for focusing on embroidery for stress relief:
– Turn off all distractions
– Take your time with stitching, and even if you need to start over a few times don’t worry
– Do not worry or be judgemental about your mistakes, learning is the result of errors made
– Listen to calming music or motivational speaking audio
Conclusion
In conclusion, embroidery is an enjoyable and gratifying craft with endless possibilities. With the knowledge provided on embroidery materials, basic stitches, embroidery techniques, and more, you’re ready to get started and create your embroidered masterpiece. Remember, embroidery is a learning process, and with practice and persistence, your embroidery skills will grow to new heights.


