Introduction
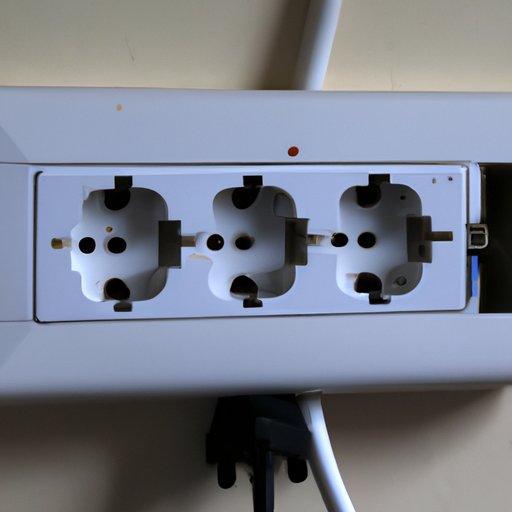
Installing a GFCI (Ground Fault Circuit Interrupter) outlet with 4 wires is an important upgrade that can improve electrical safety in your home. In this article, we’ll cover everything you need to know to safely install a GFCI outlet with 4 wires, including understanding the basics, step-by-step installation instructions, tips and tricks, troubleshooting, and best practices.
Understanding the Basics: A Beginner’s Guide to Wiring a GFCI Outlet with 4 Wires
A GFCI outlet is an electrical safety device designed to protect against electrical shock. When a fault occurs, such as a ground fault or a short circuit, the GFCI outlet detects it and shuts off power to prevent electrocution.
There are 4 wires used in the installation of a GFCI outlet: hot, neutral, ground, and load. The hot wire (black) carries current from the circuit breaker to the outlet, the neutral wire (white) carries current back to the breaker, the ground wire (green or bare) provides a path for electricity to ground safely, and the load wire is used to protect additional outlets or devices downstream from the GFCI outlet.
Step-by-Step Guide: How to Safely Install a GFCI Outlet with 4 Wires
Before beginning installation, make sure you have the necessary materials, including a GFCI outlet, wire strippers, a voltage tester, and screwdrivers.
Step 1: Turn off the power to the outlet you’ll be working on by switching off the circuit breaker. Use a voltage tester to confirm that the power is off.
Step 2: Remove the old outlet from the electrical box by unscrewing the screws that hold it in place and gently pulling it out.
Step 3: Carefully separate the wires by using wire strippers to strip the ends of each wire to expose the copper inside.
Step 4: Connect the wires to the GFCI outlet according to their functions. The hot wire (black) goes to the brass-colored screw, the neutral wire (white) goes to the silver-colored screw, and the ground wire (green or bare) goes to the green-colored screw.
Step 5: If you have a load wire, connect it to the appropriate screw on the GFCI outlet.
Step 6: Gently push the wires back into the electrical box and screw the GFCI outlet onto the box.
Step 7: Turn the power back on and test the outlet to ensure it’s working properly.
Remember to always follow manufacturer instructions and consult a licensed electrician if you’re unsure about any aspect of the installation process.
The Importance of Grounding: How to Properly Install a GFCI Outlet with 4 Wires
Grounding is an essential safety feature in electrical systems. It provides a safe path for electricity to flow to ground if there’s a fault, preventing electrical shock or fire.
To properly ground a GFCI outlet, connect the ground wire to the green screw on the outlet. If your electrical system doesn’t have a ground wire, consult a licensed electrician to have one installed.
Grounding a GFCI outlet can also eliminate nuisance tripping, where the outlet trips even when no fault is present.
Wiring Made Easy: Tips and Tricks for Installing a GFCI Outlet with 4 Wires
Wiring a GFCI outlet with 4 wires can be challenging, but there are several tips and tricks that can make the process easier:
- Label the wires before you disconnect them to make it easier to connect them to the right terminals on the GFCI outlet later.
- Use wire nuts to connect wires that are too short to reach the terminals on the GFCI outlet.
- Make sure the wires are securely fastened to the outlet terminals and that there’s no exposed wire.
Following these tips can make the installation process easier and quicker, and ensure a professional-looking installation.
Troubleshooting 101: Common Mistakes to Avoid When Installing a GFCI Outlet with 4 Wires
While installing a GFCI outlet with 4 wires is a relatively simple process, there are several mistakes that can cause problems:
- Switching the hot and neutral wires can cause the GFCI outlet to trip constantly.
- Failing to connect the ground wire can result in an unsafe installation.
- Not tightening the terminal screws enough can cause the wires to come loose and create a potential hazard.
If you encounter any issues during the installation process, consult manufacturer instructions or consult a licensed electrician.
Upgrading Your Electrical System: Why and How to Install a GFCI Outlet with 4 Wires
Upgrading to a GFCI outlet with 4 wires can improve electrical safety in your home by protecting against ground faults and short circuits.
A GFCI outlet can also reduce the risk of shock or electrocution in wet areas, such as bathrooms or kitchens, by shutting off power in the event of a fault.
When choosing a GFCI outlet, look for one that’s UL-listed and has a built-in self-test function to ensure it’s working properly.
The Dos and Don’ts: Best Practices for Installing a GFCI Outlet with 4 Wires
Follow these best practices to ensure a safe and successful installation:
- Do turn off the power to the outlet before beginning installation.
- Do follow manufacturer instructions and local building codes.
- Do use wire strippers and screwdrivers properly to avoid damaging the wires or outlet.
- Don’t use a GFCI outlet as a replacement for a grounding wire.
- Don’t install a GFCI outlet in an area exposed to weather or moisture unless it’s specifically rated for outdoor use.
By following these best practices, you can ensure a safe and successful installation of your GFCI outlet with 4 wires.
Conclusion
Installing a GFCI outlet with 4 wires is an essential upgrade that can improve electrical safety in your home. By understanding the basics, following a step-by-step guide, and using tips and tricks, you can safely install a GFCI outlet that meets your electrical needs and ensures compliance with building codes and regulations. Upgrade your electrical system today and enjoy newfound peace of mind.


