Introduction
Barn doors have been trending in home decor for a while now, and it’s not hard to see why. These rustic, sliding doors bring charm, character and practicality to any space, from full-on farmhouse to modern industrial. But what if you could make your own barn door, tailored to your exact specifications and style? This article will help you do just that, whether you’re a seasoned DIYer or a newbie looking to embark on a rewarding project. We’ll provide a comprehensive guide to building a barn door from scratch, including tips, tricks and inspiration from experts and enthusiasts.
A Step-by-Step DIY Guide
Building a barn door may seem daunting, but with the right tools, measurements and materials, it can be a fun and fulfilling experience. Here are the basic steps:
1. Measure your space and decide on your style
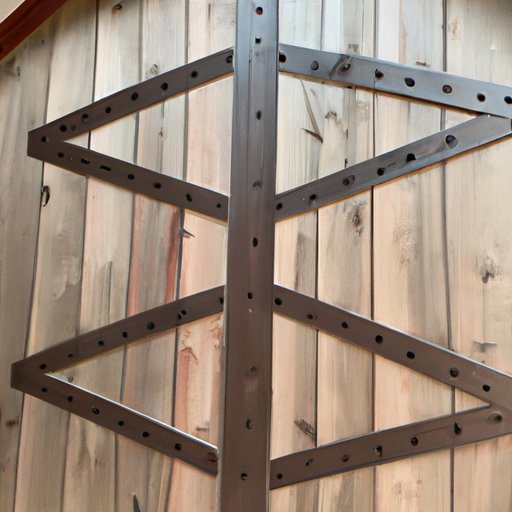
Before you buy or cut any wood, measure the opening where you want to install the barn door, and choose a style that best suits your taste, whether it’s a classic X pattern, a modern Chevron or a custom design.
2. Gather your materials and tools
You will need:
- Wood planks (amount depends on the size of your door, choose high-quality wood such as pine, oak or maple)
- Wood glue
- Screws or bolts
- A circular saw or jigsaw
- A drill with 1/8-inch and 3/16-inch bits
- A level
- A measuring tape
- A sander or sandpaper
- A paint or stain of your choice
- Barn door hardware kit, which includes a track, rollers, hangers and bolts (available online or at hardware stores)
3. Cut and assemble the frame
Based on your measurements, cut the wood planks into a frame using the saw, glue the corners and screw them into place. Add a diagonal brace for extra stability.
4. Add the panels
Using wood glue and screws, attach the horizontal and diagonal planks to create the panel design you desire. Make sure it fits snugly within the frame.
5. Sand and finish
Sand the door to remove any rough edges or splinters, and apply the paint or stain you have chosen. Let it dry completely before moving on.
6. Install the hardware
With the help of a friend or family member, attach the track to the wall above the opening, and install the hangers and rollers onto the door. Hang the door onto the track, and test it for smooth sliding. Adjust the hangers and level the door as needed.
Personal Experience
Building a barn door can be both challenging and rewarding, as I learned firsthand when I tackled my own project. One of the main things I struggled with was measuring correctly and making sure the door was level and plumb. It’s important to take your time and double-check your calculations, especially if your space is not perfectly square. Another thing to keep in mind is the weight of the door: even if you choose light wood, it can still be cumbersome, so make sure your hardware is sturdy and rated for the weight. Finally, don’t be afraid to experiment with different finishes and accents to make your barn door truly unique.
Listicle
Here are some top tips for building and customizing your barn door:
- Choose high-quality wood that is straight, smooth and free of knots or cracks.
- If you’re going for an authentic rustic look, think about distressing the wood with techniques like sanding, chiseling or burning.
- Consider using reclaimed wood or salvaged materials for a more eco-friendly and character-filled option.
- Try experimenting with different panel designs, such as herringbone, slatted or framed.
- If you want to add a pop of color, try painting the door a bold hue, or using a contrasting stain for the panels.
- Don’t forget about the hardware: choose a kit that matches your style and weight requirements, and add a handle or lock if necessary.
- If you’re short on space, consider using a bypass track system that allows two doors to slide alongside each other.
- Want to get creative? Add a chalkboard or mirror panel, or attach hooks or shelves to the front or back of the door.
- Make sure you have enough clearance above and around the opening for the door to slide smoothly.
- Don’t rush the process: building a barn door takes time, patience and attention to detail, but the end result is worth it.
Expert Advice
To get some expert insights into the art of barn door building, we talked to John, a carpentry enthusiast and DIY blogger with years of experience in woodworking. Here’s what he had to say:
“The key to a successful barn door build is precision and planning. Measure carefully, choose the right wood and hardware, and don’t be intimidated by the process. I recommend double-checking every cut and every screw, and using a level to ensure that the door slides smoothly and stays level. Another tip is to pre-drill the holes before attaching the hardware, as this will prevent splintering or cracking. Finally, remember that a barn door is more than just a practical addition to your home. It’s a statement piece that reflects your style and personality, so don’t be afraid to infuse it with some creativity and flair.”
History and Inspiration
Barn doors have a rich history in American architecture and farming, serving as functional and durable barriers to the elements and vermin. Today, barn doors have become a versatile and eye-catching element in home decor, adding texture, contrast and warmth to any room. Whether you prefer a classic look with heavy wooden planks and wrought iron hardware, or a sleeker modern version with glass or metal accents, there are endless possibilities for customization. Check out some inspiring examples online or in decor magazines, and let your imagination run wild.
Upcycling and Repurposing
If you’re on a budget or simply want to try your hand at upcycling, building a barn door using salvaged materials can be a fun and sustainable option. Look for old planks from fences, pallets or crates, and sand them down to remove any debris. Use wood glue and screws to assemble a frame and panel design, and add some character with aging techniques or paint. You can also use non-wood materials like sheet metal, corrugated iron or even vintage shutters to create a unique door that tells a story.
Conclusion
Building a barn door may seem like a daunting task, but with some patience, research and creativity, it can be a fulfilling and rewarding DIY project. Whether you’re inspired by history, rustic charm or modern minimalism, there’s a barn door style and design out there for you. Don’t be afraid to experiment, seek help from experts, and share your experiences with others. Who knows, you might just discover a new passion for woodworking and carpentry.


