Introduction
Oat flour has become a popular alternative to wheat flour for baking and cooking in recent years. Not only is it a nutritious choice, but it’s also naturally gluten-free. Many people are interested in making oat flour at home, both to save money and to have total control over the quality and freshness of their flour. In this guide, we’ll cover the benefits of making your own oat flour, the equipment you’ll need, and step-by-step instructions for making flour using three different methods. We’ll also provide tips and recipes for using oat flour in your baking and advice on how to store it for the long term.
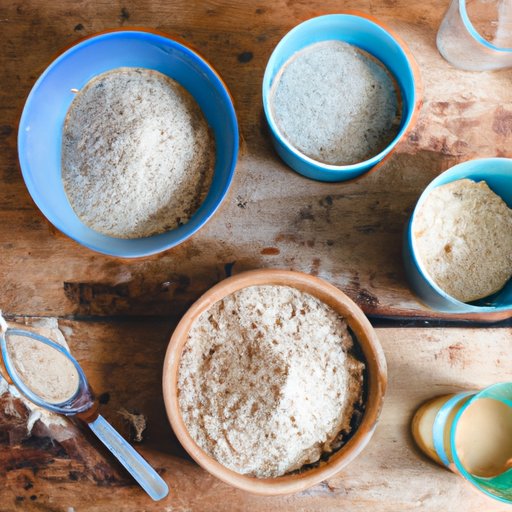
The Ultimate Guide to Making Oat Flour at Home
Before we dive into specific methods for making oat flour, let’s take a look at the benefits of making it at home.
First and foremost, making oat flour at home can save you money. Pre-made oat flour can be expensive, especially if you’re buying it from a specialty store. Making it at home is much more cost-effective.
Making your own oat flour also allows you to customize it to your liking. You can use oats of different varieties or grind the flour to different textures, depending on your preferences.
Finally, making oat flour at home is a great way to ensure that your flour is fresh and of high quality. You can grind the oats right before you need them, so you know that your flour is as fresh as possible.
Now let’s take a look at the equipment you’ll need to make oat flour at home.
First, you’ll need a high-speed blender or food processor. A coffee grinder can also work well for small batches. You’ll also need rolled oats or steel-cut oats. Make sure that your oats are gluten-free if you need them to be.
Once you have your equipment and oats ready, follow these steps to make oat flour:
- Measure out the amount of oats you want to turn into flour.
- If you’re using a high-speed blender, add your oats to the blender and blend on high until the oats are ground into a fine powder. Stop and scrape down the sides of the blender as needed. If you’re using a food processor, add your oats and process on high until the oats are ground into a fine powder. If you’re using a coffee grinder, add a small amount of oats at a time and pulse until the oats are ground into a fine powder.
- Pour the oat flour into an airtight container and store for later use, or use immediately in your favorite recipes.
Here are some common questions and troubleshooting tips when making oat flour:
- Should I use rolled oats or steel-cut oats?
- Is it okay if my oat flour has some small pieces of oats in it?
- How do I store oat flour?
- Why does my oat flour taste bitter?
Three Easy Ways to Make Oat Flour in Your Kitchen
While the above method is the most straightforward way to make oat flour, there are a few other methods that you can try as well. Here are three easy ways to make oat flour in your kitchen.
Method 1: Blend Oats in a Blender or Food Processor
This method is similar to the basic method outlined above, but with a twist. Instead of grinding the oats into flour right away, you’ll soak them in water first to make them easier to blend.
- Preheat your oven to 350°F. Spread the oats out on a baking sheet and bake for 10-15 minutes, or until lightly toasted.
- Add the toasted oats to a bowl and cover with enough hot water to fully submerge them. Let the oats soak for about 20 minutes.
- Add the soaked oats to a high-speed blender or food processor and blend on high until the oats are ground into a fine powder.
- Pour the oat flour into an airtight container and store for later use, or use immediately in your favorite recipes.
Method 2: Use a Flour Mill
If you have a flour mill at home, this method is a great option. A flour mill will grind the oats into flour quickly and efficiently.
- Fill your flour mill with oats and turn it on.
- Collect the oat flour in a container as it comes out of the mill.
- Store the oat flour in an airtight container for later use or use immediately in your favorite recipes.
Method 3: Use a Mortar and Pestle
If you don’t have access to high-tech equipment like a blender or food processor, a mortar and pestle can work well for small batches of oat flour.
- Add a small amount of oats to the mortar.
- Use the pestle to grind the oats into a fine powder.
- Repeat with the rest of the oats until they’ve all been ground into flour.
- Pour the oat flour into an airtight container and store for later use, or use immediately in your favorite recipes.
Now that you know a few different ways to make oat flour, let’s take a closer look at why you should consider making your own in the first place.
Why You Should Make Your Own Oat Flour at Home
We’ve already touched on a few of the benefits of making oat flour at home, but let’s dive a bit deeper into why it’s such a great choice.
First of all, making your own oat flour can save you a significant amount of money over time. Pre-made oat flour can be expensive, especially if you need large quantities. When you make your own at home, you can buy oats in bulk and grind them into flour as needed, which is much more cost-effective.
Making oat flour at home also allows you to have total control over the quality of your flour. With pre-made flour, you may not know how long it’s been sitting on store shelves, or what additives or preservatives have been added to it. When you make your own flour at home, you know exactly what’s going into it and can ensure that your flour is fresh and high-quality.
In addition, making your own oat flour is a great choice for people with specific dietary needs. Oat flour is naturally gluten-free, so if you’re following a gluten-free diet, making your own oat flour is a must. Plus, making your own flour gives you the freedom to choose the type of oats you want to use. Rolled oats are most commonly used, but you can also use steel-cut oats, which will produce a slightly coarser flour.
From an environmental and ethical standpoint, making your own oat flour can also be a smart choice. By making your own flour at home, you’re reducing the amount of packaging waste that comes along with pre-made flour. Plus, you have the ability to choose oats that are sourced sustainably and ethically.
Finally, making your own oat flour is a great way to promote a healthy and sustainable lifestyle. Oat flour is a nutritious choice for baking and cooking, and making it at home allows you to experiment with new recipes and flavors.
Creative Uses for Oat Flour in Your Baking
Now that you know how to make your own oat flour at home, it’s time to start using it in your baking. Oat flour is a versatile ingredient that can be used in a variety of recipes. Here are a few ideas to get you started:
- Use oat flour in place of all-purpose flour in muffins and quick breads for a healthier twist on a classic recipe.
- Mix oat flour with water to make a paste, then use it as a gluten-free thickener for soups and stews.
- Add oat flour to your favorite pancake recipe for extra texture and flavor.
- Use oat flour as a base for homemade pizza crust.
Here’s a recipe for oat flour banana bread to get you started:
Ingredients:
- 1 1/2 cups oat flour
- 1/2 tsp baking soda
- 1/2 tsp cinnamon
- 3 ripe bananas, mashed
- 1/4 cup honey
- 1/4 cup melted coconut oil
- 2 eggs
- 1 tsp vanilla extract
Instructions:
- Preheat your oven to 350°F. Grease a loaf pan and set aside.
- In a large bowl, whisk together the oat flour, baking soda, and cinnamon.
- In a separate bowl, whisk together the mashed bananas, honey, coconut oil, eggs, and vanilla extract.
- Add the wet ingredients to the dry ingredients and stir until just combined.
- Pour the batter into the prepared loaf pan and bake for 45-50 minutes, or until a toothpick inserted into the center comes out clean.
- Let the bread cool in the pan for 10 minutes, then remove it from the pan and cool completely on a wire rack.
- Slice and serve.
How to Store Your Homemade Oat Flour for Long-Term Use
Once you’ve made your oat flour, you’ll want to store it properly to ensure that it stays fresh and usable for as long as possible.
The best way to store oat flour is in an airtight container in a cool, dry place. You can store it in the pantry, but if you live in a particularly humid environment, you may want to store it in the refrigerator or freezer instead.
To prevent spoilage, make sure that your oat flour is completely dry before storing it. Any moisture can lead to mold growth or spoilage over time.
When using your homemade oat flour in recipes, be aware that it may behave differently than pre-made flour. Because homemade flour doesn’t contain any stabilizers or preservatives, it may have a shorter shelf life and may not behave exactly the same as pre-made flour in recipes. Be sure to watch closely and make adjustments as needed.
Conclusion
As you can see, making oat flour at home is a great choice for anyone interested in a healthier, more sustainable lifestyle. With just a few simple tools and some quality oats, you can create your own high-quality flour for a fraction of the cost of pre-made flour. Whether you’re looking to save money, customize your flour, or experiment with new recipes, making oat flour at home is a great place to start.
If you have any questions or want to learn more, there are plenty of resources available online. Start by checking out your favorite recipe websites or home baking blogs, or connect with other home bakers on social media. With a little creativity and some quality ingredients, the possibilities are endless.


