Introduction
Staining a fence is an important part of maintaining and enhancing the look and durability of your fence. A well-stained fence not only looks great, but also provides protection from the elements and helps prevent rot, decay, and discoloration. In this article, we will guide you through the entire process of staining a fence, from preparing the fence to choosing the right stain and application method, to troubleshooting common issues.
How to Prepare Your Fence for Staining: A Step-by-Step Guide
Before you begin staining your fence, it’s important to properly prepare it to ensure a successful, long-lasting finish. This involves cleaning the fence, sanding it to remove any rough spots or old finish, and repairing any damage. Here’s a step-by-step guide:
- Clean the fence: Use a pressure washer or a hose with a high-pressure nozzle to remove dirt, grime, and debris from the fence. Allow the fence to dry completely.
- Sand the fence: Use a sander or sandpaper to smooth out any rough spots or old finish on the fence. Make sure to sand in the direction of the grain. Wipe off any dust with a clean, dry cloth.
- Repair any damage: Fill any holes, gaps, or cracks in the fence with wood filler. Sand the filler once it has dried, until it’s level with the surrounding wood.
Top Tips for Choosing the Right Stain for Your Fence
When it comes to choosing a stain for your fence, there are several factors to consider, including the type of stain, color, opacity, and special features like UV protection and water resistance. Here are some tips:
- Choose the right type of stain: There are three main types of stains: solid, semi-transparent, and transparent. Solid stains provide the most coverage and are best for hiding imperfections, while transparent stains allow the natural wood grain to show through.
- Select the right color: Choose a stain color that complements your home’s exterior and any other structures in your yard. Consider using a lighter color to reflect sunlight and prevent the fence from becoming too hot.
- Consider opacity: Opacity refers to how much of the wood grain shows through the stain. The more opaque the stain, the less natural wood will show through.
- Look for special features: Some stains offer special features like UV protection and water resistance, which can help prolong the life of your fence and keep it looking great for longer.
The Best Tools and Materials for Staining Your Fence
Having the right tools and materials can make all the difference in achieving a perfect finish when staining your fence. Here are some of the essential items you’ll need:
- Brushes: Use a high-quality brush designed for stain application. Avoid using cheap brushes that may leave bristles in the stain.
- Rollers: Rollers can be an effective way to apply stain to larger areas, but they may not work well for uneven surfaces or hard-to-reach spots.
- Sprayers: Sprayers can be a fast and efficient way to apply stain, but they require careful preparation to avoid overspray and ensure even coverage.
- Protective gear: Wear protective clothing, gloves, and eyewear to avoid getting stain on your skin or in your eyes.
- High-quality stain: Choose a high-quality stain that is specifically designed for outdoor use and provides the level of coverage and opacity you need.
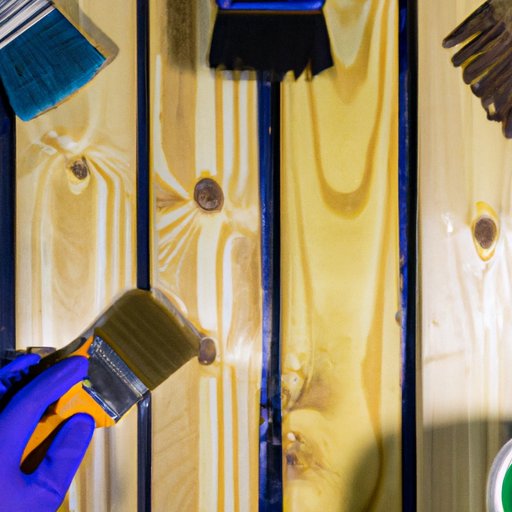
Applying Stain to a Fence: Dos and Don’ts for a Perfect Finish
Now that you’ve prepared your fence and gathered your tools and materials, it’s time to start applying the stain. Here are some dos and don’ts to keep in mind:
- Do apply stain in the shade: Staining in direct sunlight can cause the stain to dry too quickly and lead to uneven coverage and lap marks.
- Don’t over-apply stain: Applying too much stain can lead to drips and streaks. Apply the stain in thin, even coats to ensure a smooth finish.
- Do use the right technique: Use a long, smooth stroke to apply the stain, following the grain of the wood. Avoid brushing back and forth, which can create uneven coverage.
- Don’t rush the process: Take your time and work methodically to ensure even, consistent coverage.
- Do blend any overlap: If you need to take a break while staining, be sure to blend any overlap before the stain dries to avoid lap marks.
How to Clean and Maintain Your Stained Fence: A Complete Guide
After you’ve applied the stain, it’s important to maintain your fence to keep it looking great for years to come. Here’s a step-by-step guide to cleaning and maintaining your stained fence:
- Clean the fence: Use a mixture of mild soap and water, or a specially formulated fence cleaner, to gently scrub the fence. Rinse with a hose and let it dry completely.
- Apply sealer: Applying a sealer to your fence can help protect the stain from the elements and prolong the life of your fence. Follow the manufacturer’s instructions carefully.
- Maintain the fence: Inspect your fence regularly for signs of damage or wear, such as cracks, warping, or discoloration. Make any necessary repairs promptly to prevent further damage.
Alternative Methods for Staining Your Fence: Spray, Brush, or Roll?
There are several different methods for applying stain to a fence, including spraying, brushing, and rolling. Here are some pros and cons of each method:
- Spraying: Spraying can be a fast and efficient way to apply stain, but requires careful preparation to avoid overspray and ensure even coverage.
- Brushing: Brushing is a traditional method that can provide great control and precision. However, it can be time-consuming and may be difficult for large areas or hard-to-reach spots.
- Rolling: Rolling can be an effective way to apply stain to larger areas, but may not work well for uneven surfaces or areas with obstacles.
Troubleshooting Common Issues in Staining Your Fence and How to Fix Them
Despite your best efforts, problems can sometimes arise during the staining process. Here are some common issues and how to fix them:
- Uneven coverage: Uneven coverage can be caused by a variety of factors, such as over-application or an uneven surface. Try to blend the area with stain that is already on the fence to achieve an even coverage.
- Blotching: Blotching occurs when the wood absorbs stain unevenly, often resulting in dark, splotchy areas. This can be prevented by properly preparing the wood and using a pre-stain conditioner.
- Bubbling: Bubbling occurs when air becomes trapped under the stain, causing unsightly bubbles to form. This can be prevented by working slowly and carefully, and avoiding too much agitation of the stain.
Conclusion
Staining a fence is an important part of maintaining and enhancing the look and durability of your fence. By following the steps outlined in this article, you can achieve a perfect finish that will protect your fence and keep it looking great for years to come. Remember to choose the right stain, prepare your fence properly, and take your time during the application process. With a little care and attention, you can enjoy a beautiful, well-stained fence for years to come.


