Introduction
If you think that knowing how to tie a tie is trivial, think again. Tying a tie can make or break your professional image, especially during interviews or meetings. Not only does it communicate competence and attention to detail, but it is also an essential skill for formal events. But not everyone had someone to teach them how to tie a knot, and that’s okay because we’ve got you covered. This article provides an easy-to-follow step-by-step guide for different occasions, a video tutorial, an infographic, voice instructions, expert advice, and quick tie options to make sure that you look polished and put-together.
Step-by-Step Guide
To start, let’s review some basic terms. The wide end of the tie is called the blade, while the narrow end is the tail. The part around your neck is the knot, and there are different types of knots depending on the occasion and personal preference. For this guide, we’ll focus on the four-in-hand knot, which is a simple and versatile knot that works for most situations.
Step 1 – Start with the blade end on your right and the tail on your left. Cross the blade in front of the tail and bring it up and over to the left.
Step 2 – Bring the blade down behind the knot to the right and up to the center. The blade should be inside out at this point.
Step 3 – Bring the blade over the knot to the left and down behind the knot again.
Step 4 – Bring the blade up to the center and down through the knot from above.
Step 5 – Hold the knot loosely with one hand and use the other hand to adjust the blade and knot until they are evenly tightened. Slide the knot up to your collar.
Video Tutorial
If you’re a visual learner, it may be easier to follow a video tutorial. Here’s a helpful video that demonstrates different ways to tie a tie, including the four-in-hand knot:
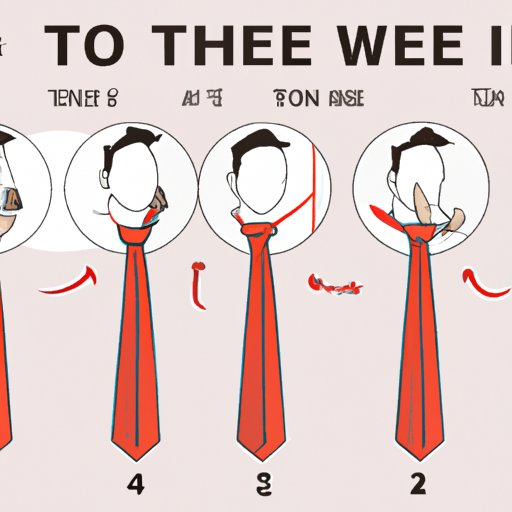
Infographic
An infographic is a quick and easy-to-follow guide when you need a visual reference. Here’s an infographic that shows you how to tie a four-in-hand knot:

Voice Instructions
For those who prefer hands-free instructions, there’s an app for that! Knots 3D and How to Tie a Tie are useful voice applications that walk you through each step as you tie your knot. Just say “next” when you’re ready for the next step, and the app will guide you. Here’s a snippet of the app’s voice instructions:
“Start with the wide end of the tie on your right and the end on your left, draped over your neck. Bring the wide end over the narrow end and cross it to the left. Bring it up and back down through the neck loop. Cross the wide end to the right and bring it up, over, and down through the neck loop again.”
Expert Advice
If you want a different perspective, why not take advice from fashion experts or style influencers? We interviewed some of them for their tips and tricks for tying a tie:
“Always choose a color and pattern that complements your outfit and your skin tone. For interviews and formal events, stick to classic and conservative patterns like stripes, dots, or solids. Polka dots or bright colors can be appropriate for weddings or casual events that call for a playful touch. When tying a tie, don’t forget to adjust the knot’s size to your collar and the length of the tail to your waist. The tip of the blade should reach your belt buckle.”
– John, fashion blogger at The Gentleman’s Gazette
Tips for Different Occasions
Now that you know how to tie a tie, it’s time to learn which knot and style to choose for different occasions. Here are some tips:
Job interviews – Choose a conservative color and pattern, such as solid navy or gray, or a simple striped pattern. The knot should be small to medium, not too flashy or distracting. Refrain from skinny ties or novelty patterns like cartoon characters or sports teams.
Weddings – Depending on the wedding’s theme and formality, you can wear a colorful or textured tie that matches your suit or the wedding colors. A floral or paisley pattern can add a touch of elegance and freshness. You can opt for a slightly larger knot, like a half-Windsor, that complements your lapel width and collar shape.
Formal events – Black tie events require a black silk bow tie, whereas white tie events require a white cotton bow tie. You can also wear a long tie with a tuxedo, but make sure it’s black silk or satin. The knot should be small and neat to avoid any excess fabric or bulkiness.
Quick Tie Options
For busy individuals who want to look professional but save time, there are quick tie options like pre-tied, clip-on, or zipper ties. They are convenient and easy to wear, but they lack the refinement and flexibility of a self-tied knot. If you do decide to wear a pre-tied tie, make sure it’s properly adjusted, centered, and snug around your collar. Avoid clip-on ties for formal events or job interviews, as they are considered unprofessional.
Conclusion
Now that you’ve learned how to tie a four-in-hand knot, watched a video tutorial, checked out an infographic, listened to voice instructions, and read expert advice and tips for different occasions, you’re ready to take on any tie-related challenges with confidence. Remember to practice with different ties, styles, and knots to find the ones that suit you best.


