Introduction
Cooking turkey is a Thanksgiving tradition that’s celebrated by millions every year. Although the process of cooking turkey is relatively easy, some people encounter difficulties when tucking the wings. The turkey wings can get burned, dried out, or overcooked if not tucked properly. That’s where our article comes to help. The purpose of this guide is to provide a step-by-step approach to tuck turkey wings like a pro. We’ll highlight the benefits of tucking turkey wings, explain the different ways to handle turkey wings during cooking, and provide tips and techniques for mastering this culinary art.
The Basic Guide to Tucking Turkey Wings – A Must-Try for Beginners
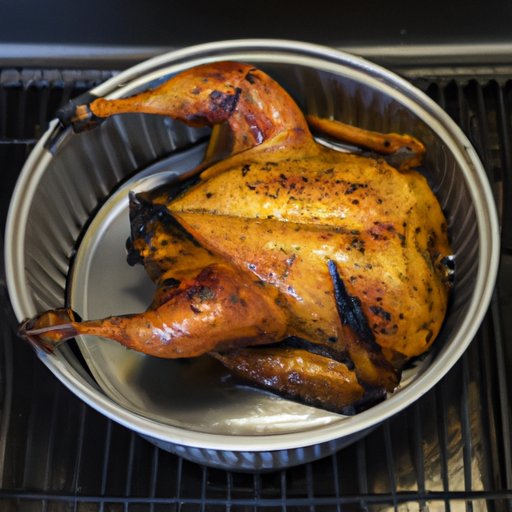
Tucking turkey wings is a process of securing them under the body of the turkey to prevent them from burning or drying out during cooking. There are several reasons why it’s important to tuck turkey wings:
- Even Cooking – Tucking the wings helps distribute heat evenly throughout the bird, making it cook more evenly.
- Better Presentation – Tucking the wings creates a more streamlined appearance, making it more attractive when presented on a platter.
- Easy to Carve – Tucking the wings helps keep them out of the way, making it easier to carve the turkey.
To tuck turkey wings, follow these instructions:
- Fold the wings behind the turkey.
- Grasp the tip of the wing, folding it under the bird’s body.
- Tuck the wing tightly under the bird, securing it in place with a toothpick or skewer.
- Repeat the process with the other wing.
As you tuck the wings, be sure to avoid pulling them too tightly, as this can stretch the skin and make it tear. Also, avoid using too many toothpicks or skewers, as they can pierce the skin and release juices during cooking. Just a few toothpicks or skewers at key points should be sufficient to secure the wings in place.
5 Simple Steps to Tuck Your Turkey Wings Like a Pro
To ensure the success of your Thanksgiving dinner, here are five simple steps to tuck turkey wings like a professional:
- Step 1: Clean your bird thoroughly, make sure the turkey wings are dry.
- Step 2: Start tucking your turkey wings after your bird is fully prepared.
- Step 3: Grasp the tip of the wing firmly and carefully pull it towards the turkey’s back.
- Step 4: Tuck the wings tightly under the turkey’s body, making sure they are flat against the bird’s breast meat.
- Step 5: Secure the wings in place with a toothpick.
It’s easy to make mistakes while tucking turkey wings, such as pulling the skin too hard or poking the bird with a toothpick. To avoid these, be gentle while tucking, and use small, short strokes when sliding the turkey wing inside the bird’s body.
A Demonstration on How to Tuck Turkey Wings Using Common Kitchen Tools
There are several kitchen tools you can use to make tucking turkey wings easier, such as skewers and twine. Here’s a step-by-step guide on how to use them:
- Step 1: Cut a long piece of twine and lay it flat on a cutting board.
- Step 2: Place the turkey on top of the twine, positioning the wings so they are flat against its back.
- Step 3: Wrap the twine firmly around the bird and cross it over the top of the breast.
- Step 4: Run the twine under the wings, pulling the wings tight against the body.
- Step 5: Tie the twine in a tight knot, securing the wings in place.
Another method is to use skewers. Here’s how:
- Step 1: Insert a skewer into the turkey wing, pulling it tight against the body.
- Step 2: Insert another skewer into the other wing, pulling it tight against the body.
- Step 3: Cross the skewers over each other, securing the wings in place.
It’s essential to listen to your turkey, some may not respond well to skewers or twine. If you feel your bird is too small, use twines, and vice versa.
Mastering the Art of Turkey Wing Tucking – Tips and Techniques
Here are some additional tips and techniques for mastering the art of turkey wing tucking:
- Tip 1: Start early – tucking turkey wings the day before cooking can make all the difference.
- Tip 2: Don’t forget to pat-dry turkey wings before tucking.
- Tip 3: Try using spices and herbs to enhance the flavor of the wings while tucking.
- Tip 4: Proper preparation of the bird is critical – having the turkey fully cleaned will help make it easier to tuck the wings.
- Technique 1: Split the wings – Some people find it easier to split turkey wings down the joint before tucking them.
- Technique 2: Place the bird upside down – Some professional chefs swear by placing the bird upside down for the first half-hour of cooking, claiming it makes the meat moister and improves the texture of the skin.
Remember, practice makes perfect. By mastering these tips and techniques, you’ll soon become a turkey wing tucking expert!
Why Tucking Your Turkey Wings is Worth the Effort – Benefits and Tricks
Aside from the reasons mentioned above, tucking your turkey wings also has other benefits. Here are some tips to help you make the most of it:
- Tip 1: Inject liquid into the wings – Using a meat injector to infuse the wings with broth or butter can make them juicier and more flavorful.
- Tip 2: Use a dry rub – Applying a dry rub to the wings before tucking can enhance their flavor, making them more appealing.
- Tip 3: Stuff the turkey – By stuffing the turkey, it can add more flavor, and it will keep the stuffing moist.
Tucking your turkey wings may take a bit more effort, but it’s well worth it. By tucking the wings, you’ll ensure that they cook evenly and stay moist, making for a juicier and more flavorful turkey.
Tuck or Not to Tuck? A Comprehensive Guide on the Different Ways to Handle Turkey Wings During Cooking
Now that you know all the benefits of tucking turkey wings, you may be wondering whether to tuck or not to tuck. Some people prefer to leave their turkey wings untucked for a more rustic look, while others find tucking to be a must. Here are the pros and cons of both methods:
- Untucked Turkey Wings:
- Pros: A more rustic appearance, easier to handle, can be seasoned separately.
- Cons: Can dry out or burn, the wings can become overcooked.
- Tucked Turkey Wings:
- Pros: Even cooking, attractive presentation, easy to carve.
- Cons: Takes longer to prepare, requires extra effort to execute well.
Ultimately, the decision to tuck or not to tuck is up to you. While tucking turkey wings can help ensure a great-looking and evenly cooked turkey, leaving them untucked can provide a more rustic and unique appeal.
Conclusion
If you’re looking to make turkey wings appeal to your guests, tucking is the way to go. Follow our six-section guide and see the difference it makes. Not only does it improve the final look, but it helps with even cooking and ensures the juiciest turkey wings. Next time you cook a turkey, remember to tuck the wings and watch the difference it makes.
If you enjoyed reading our guide on how to tuck turkey wings, please share it with your family and friends to help them achieve a perfectly roasted turkey. And don’t forget to subscribe to our newsletter for more tips and tricks to make cooking easier.


